 Step-by-step directions for registering a custom domain name, signing up for web hosting, installing WordPress, choosing a theme and setting up widgets and plugins to get started with a WordPress website or blog
WordPress is a powerful content management platform that can be used to run a very basic blog or full company website. And how simple or how custom you want your blog or website to be using the WordPress publishing platform is entirely up to you.
Setting up a WordPress website or blog with a custom domain name (your own URL without .wordpress.org in the website address) is really the best way to go if you want a professional looking web presence. The process requires first registering a domain name of your choice, signing up for a monthly web hosting account, and then customizing the site to look and perform the way you want.
Step One: Registering a Custom Domain Name for WordPress
If you sign up for a blog with WordPress.com you will get a free domain name that includes .wordpress.org in it. But for professional looking websites and blogs you need to register a custom domain name and utilize the WordPress.org publishing platform.
Here are some quick tips for choosing your custom domain name:
- Choose a catchy name that is easy to remember
- Choose a name that is relatively short (2-3 words joined together)
- Avoid unusual acronyms that don’t make sense – tricky acronyms can be confusing in search results and for people manually typing in an address
- Choose a name that encompasses your overall theme of the site (niche sites on a topic/theme tend to do best for new websites and blogs)
- Your domain name does not have to be your main keywords (although sometimes helpful)
- Think long term with multiple websites – if you are developing a series of niche websites that are a similar theme you may want to come up with a name that ties them all together but has a slight variation in each websites name (note: if you are able to plan ahead with a series of website names, register them all at once!)
- A .com domain name is still preferred, but other domain extensions may be better for local/regional sites (such as .ca or .uk)
- Most domains cost less than $10 a year – stay away from expensive ones unless it is really necessary for your business (note: one word domains and popular or competitive phrases tend to cost much more – be creative and save money!)
There are many domain name register companies to choose from. It is best to stick with well-known names that you know will manage your annual domain name registration renewal properly, and of course offer you the best price.
>>See our full directory of domain registration tools
Our pick for registering a domain name:
GoDaddy – our personal pick for domain registration – they just make it easy to register and change the NAMESERVERS to any other hosting provider super easy. They also offer Canada and UK as well as US domains. Most basic domains are $9.99 or less.
Step Two: Sign up for Monthly Web Hosting for Your Custom Domain
A free WordPress.com account comes with hosting, but a WordPress.org site with a custom domain requires you to sign up for a web hosting plan with a separate web hosting provider. Check out Consumers Advocate for reviews of the best WordPress hosting options.
Here are some quick tips for choosing a web hosting provider for your WordPress site:
- Choose a web hosting provider that offers easy WordPress install (most can preload it for you)
- Choose a well-known company with good customer service
- Shop by price and service – you do not need to use the same provider for domain registration and web hosting (some say its better to keep registrations seperate from hosting in case you want to switch hosting)
- Flexible plan options – look for low monthly rate for one domain or a low monthly rate for unlimited domains (see below for more on that)
- Hosting should come with free email service, file management (through what is typically called a CPANEL), unlimited storage space and bandwidth
Unlimited Domain Hosting
Once you see how easy it is to get your first website or blog set-up on WordPress you will likely want to do more than one site. This is especially true if your goal is to create niche websites or blogs – you can run them on separate domain names to take advantage of search engine traffic for one niche. In this case, selecting a web hosting plan that offers you unlimited domain hosting for one monthly rate will give you the best value. You simply roll them all under one web hosting plan and pay only one monthly bill.
>>See our full directory of web hosting tools
Our top pick for web hosting providers:
HostGator – we use HostGator because their customer service is really good, their shared hosting plan is only $8 a month for multiple domains and they have a super easy 1 step process for installing WordPress on a domain. For one domain hosting is as low as $3.96/month, and the multi-site plan is only $7.96/month. Get hosting with HostGator
Note: If you register your domain with GoDaddy and then sign up for HostGator hosting you simply enter the NAMESERVERS (given to you in your confirmation email after you sign up for HostGator) into the Domain Management Center with GoDaddy. This points the domains to HostGator and then HostGator will host it under your hosting package going forward.
Step Three: Choose a WordPress Theme for Your Website or Blog
A WordPress theme is the overall style or template for your website or blog. This is actually one of the trickiest steps in my opinion because there are SO many themes to choose from. There are LOTS more WordPress.org themes to choose from (as opposed to standard WordPress.org themes).
The good news is that you can change a theme anytime you want… but best to do it early in the process because if you customize too much it will be more work swapping out the theme later on in the process.
After you install the WordPress publishing platform with your web hosting provider you will be given login instructions (typically just your domain name with /wp-login at the end). You can then search for available themes from within WordPress under the “Appearance, Themes” tab.
Here are some basic tips for choosing a WordPress theme for your website or blog:
- Decide on the basic needs of your site – 2 columns vs 3 columns, menu navigation, desired colors, etc. If you have a “look” in mind it sometimes makes it easier to narrow down your WordPress theme search.
- Themes that offer a “Responsive” layout will automatically adjust based on screen size or device (like smartphones or iPads) without the need of maintaining a mobile website.
- Select a theme that offers customization of style and functionality – when you install a theme under the “Appearance” tab you will see “Theme Options”. Good themes offer a lot of options to customize colors, font sizes, layouts and other built-in functionality.
- Consider availability of widget locations – such multiple sidebar locations, the footer or even within a post section. More widget location options will allow you to customize the look of your site as your customization needs expand.
Step Four: Select Widgets and Plugins to Customize Your WordPress Theme and Website
 Your WordPress theme may come preloaded with certain functionality along with the basic style template, but you will likely need to install plugins and widgets for additional functionality on your website or blog. The unlimited availability of widgets and plugins is one of the reasons WordPress is often considered to be a better blogging platform than Blogger.
Your WordPress theme has predefined widget areas where you can add widget functionality. These widgets are typically visible content aspects of your site like: related posts, popular posts, social media follow icons, twitter feeds, HTML/Text fields (for inserting ads or custom info), etc.
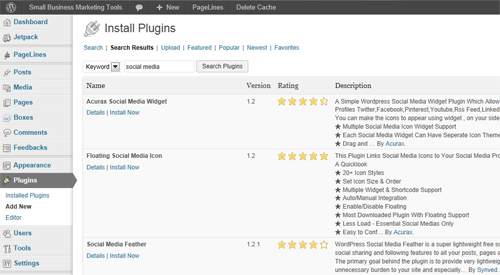
Plugins typically create additional functionality on your site and are more “behind the scenes” (although some plugins do work as widgets too!) If you are trying to do something on your site, simply search for terms and see what options there are for plugins. You’ll see a rating, description and often screenshots. And best of all, you can install and uninstall plugins at any time. So if you want a great related posts plugin you can try out a few before settling on one.
With so many widgets and plugins to choose from, where do you start? Its best to start with the basics and then add on more as you identify the needs.
Some basic widgets and plugins you may want to add include:
- Jetpack by WordPress – new installations of WordPress include “Jetpack” that has some good basic tools to use (contact forms is my favorite)
- Add Meta Tags – this plugin automatically adds descriptions and keyword meta tags to your posts based on your content, or you can customize.
- Disquis Comment System – a popular commenting plugin that lets users comment by posting with their Facebook, Twitter, Google+ or Disquis user ids
- Google Analytics for WordPress – easy way to add your Google Analytics tracking code
- Enable Media Replace – great feature that adds a “replace file” option to your images so you can easily update an image anywhere on your site
- Social Media Widget – add social media profiles to your sidebar to encourage following
- Related Posts Plugin – there are many to choose from that you can choose based on style, but this is a MUST for encouraging readers to visit other articles/posts on your site
- Widget Controller – this lets you decide which widgets only appear on certain pages or categories (so not EVERY widget appears on every page of your site). This is one of my favorites for making sidebar content more relevant on various types of content pages.
Step Five: Create and Publish Content for Your New WordPress Website or Blog
Now that you are all set up its time to create compelling, original content for your site! WordPress is a great tool for creating both static pages and blog posts. Note that pages you will want to include in your site navigation (either in your main navigation, sidebar or footer) and posts are usually considered your blog content.
Some basic pages you will want to include on your site are:
- About page – tell readers what your site is all about and the expertise you bring to the topic
- Privacy page – use a standard policy privacy along with any disclaimers (like the use of advertising or affiliates)
- Contact page – set up a standard contact form for inquiries with easy WordPress contact forms
Once you get rolling with your new site you will likely create more static pages that are specific to your site goals (like how to advertise or guest post/writer opportunities).
Not ready to set up your WordPress website or blog with custom domain yet? Bookmark this page and save it for later! We’ll also be updating this process with more step-by-step directions on WordPress processes soon.
Editorial Staff
Latest posts by Editorial Staff (see all)
- Adapting Regulatory Frameworks to the Challenges of Financial Industry in the Digital Era - March 19, 2024
- How to Sell Company Merch Online With Print on Demand - March 11, 2024
- Unlocking Easy Ways To Start A Successful Fitness Brand - February 15, 2024
- The Impact of Digital Transformation on Traditional Business Models - November 8, 2023
- Personal Trainer Marketing Strategies And Tips - November 6, 2023